Showing posts with label Blogging Marathon. Show all posts

Wednesday, April 8, 2015

Orange Cupcakes

Orange Cupcakes are a delicious little bites. I was craving for these orange flavored cupcakes for few days & decided to put an end to that misery. One fine day I made these orange flavored, nutella frosted cupcakes & fell in love with them again & again. I always loved how the combo of orange & chocolate tasted, so thought of frosting them with chocolate butter cream. Later I decided to use nutella layering as it is simple & readily available in pantry. I didn't sprinkle them with edible confetti but you can add it to make colorful & yum.
Prep Time-15mins 
Bake Time-25minutes
Serve-6Cupcakes 
Ingredients
3/4Cup all-purpose flour
1/2Tsp baking powder 
1/4Tsp baking soda 
Pinch of salt
1/4Cup butter melted or @room temperature
1Large egg @ room temperature
1/4Cup sugar + 4Tbs sugar
1Tbs orange zest
1/4Cup orange juice
1/2Tsp vanilla extract 
2Tbs thick yogurt / greek yogurt
Nutella for frosting 
Directions
Pre-heat oven @350 degrees & add liners to the cupcake pan. 
Dry ingredients 
- In a bowl sift flour, baking powder, soda & salt. Mix them with a spatula & keep aside. 
Wet Ingredients 
- In a large bowl break open egg, add in sugar to it & mix them to a creamy consistency.
- Next mix in orange zest, juice, vanilla extract & yogurt. 
Batter & Baking
- Incorporate dry ingredients to wet ingredients little by little. Mix them well. 
- Once the batter is ready scoop them in to cupcake liners halfway thru. 
- Bake them @350 degrees for 25mins or till the wooden pik comes out clean.
- Remove from oven & cool them down. 
Frosting 
- Take a generous amount of Nutella & frost it to cup cakes. 
- Sprinkle on some edible confetti & serve. 
Note
- Sugar was just perfect in these cupcakes. You can add whole 1/2Cup of sugar to make them little more sweeter. With nutella frosting they were perfectly sweet enough. 
- Oven time varies so adjust it as needed.
- Replace butter with canola or vegetable oil.
Follow me on "Facebook", "Google+", "Pinterest", "Instagram" for daily updates. Leave me a comment on any queries regarding this recipe & I will be able to answer it for you as soon as possible. 

Tuesday, April 7, 2015

Pink Velvet Choco Chip Cupcakes

Pink Velvet Choco Chip Cupcakes are a mock of red velvet cupcakes with an addition of choco chips. I was confused in naming these cup cakes as they are not dark pinkish in color. Vanilla cupcake recipe was the basic to these cupcakes along with an addition of few ingredients make these awesome cupcakesIf needed replace food coloring with beetroot juice & enjoy goodness of the veggies along with the sweet little cupcakes. I made them for two cute little kids who were visiting us from India & they loved them a lot. To make them more delectable top them with your choice of frosting & enjoy.
Prep Time-20mins 
Cook Time-25mins 
Serves-10 to 12Cupcakes
Ingredients 
1&1/2Cups of all purpose flour
1&1/2Tsp baking powder
1/4Tsp baking soda
1/4Tsp salt 
2/3Cup sugar 
2 Large eggs @ room temperature 
3/4Cup unsalted butter melted
1/2Cup milk (Used 2% fat milk)
2Tsp vanilla extract
3Drops of red food color
1/2Cup choco chips
Directions
Pre-heat oven @350 degrees & line up a cupcake pan with 12 liners. 
- In a bowl sift flour,baking powder, baking soda & salt. Mix them with a spatula & keep aside. 
- In another bowl crack open eggs. To that add butter & sugar. Mix them to a smooth batter using a electric mixer. 
- Add in vanilla extract, food color & milk to the batter & mix them. 
- Now mix in dry ingredients to the wet once little by little while beating them together. 
- Lastly add in choco chips & fold them in to batter. Keep a few aside to top them on the cupcakes.
- Scoop up the batter in to the arranged liners equally. Top them with choco chips.
- Bake them @350 degrees for 20mins or till the wooden pick comes out clean. 
- Remove from oven & cool them. Enjoy them as they are.
Note: 
- Sweetness was just enough in cupcakes. Instead of 2/3rd cup add whole 1Cup of sugar for slightly more sweeter cupcakes.
- Replace butter with olive oil Or use half & half of both to cut some calories.
- Baking time varies from oven to oven. Adjust the timing accordingly.
Follow me on "Facebook", "Google+", "Pinterest", "Instagram" for daily updates. Leave me a comment on any queries regarding this recipe & I will be able to answer it for you as soon as possible. 

Monday, April 6, 2015

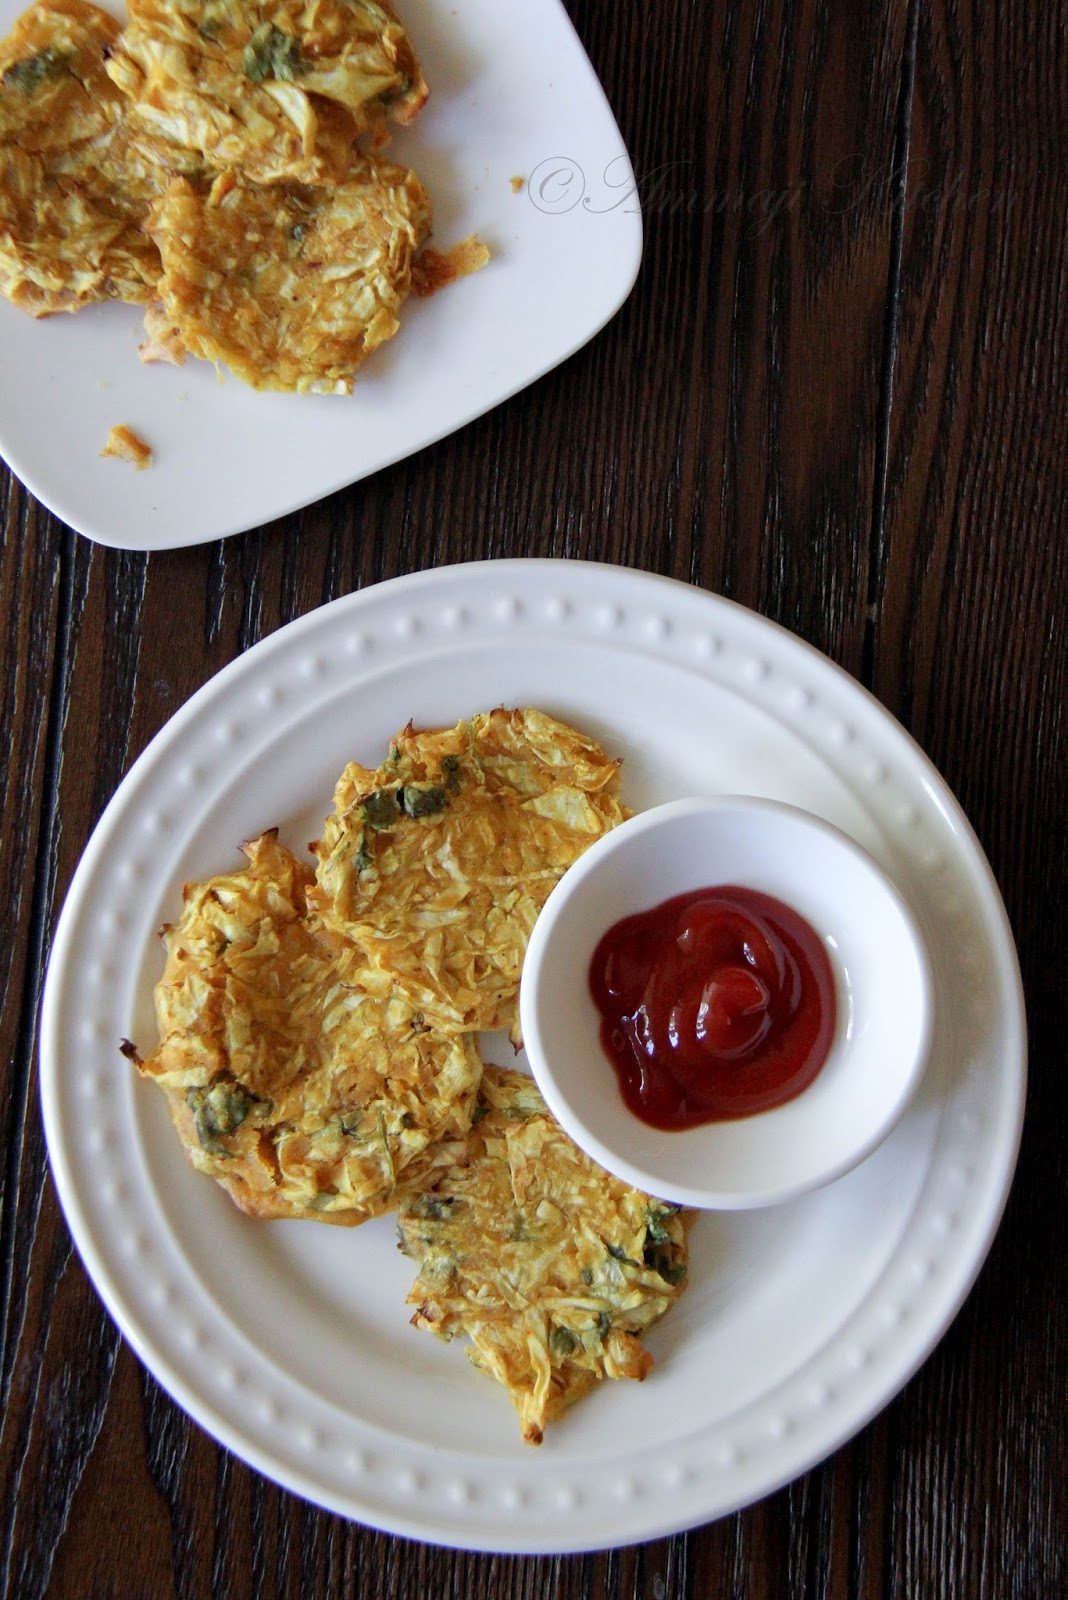
Cabbage Fritters

Cabbage Fritters are deliciously healthy snacking option for all. These fritters or pakoras don't have a texture of your usual deep fried pakoras which are very crunchy to bite inside out, but these have a perfect crisp on top & are soft from inside. apart from besan, cabbage also gets a nice crispy texture & they are perfect for tea time snack to time pass bites. They are a guilt free snack you can enjoy when ever you want. Give them a try & indulge in these healthy version of pakoras.
Prep Time:10mins 
Cook time-20mins 
Serves-3people
Ingredients 
1Cup shredded cabbage 
1/2Cup besan/chickpea flour
2Tbs rice flour 
1Tsp chili powder 
1Tsp minced garlic paste 
1Tsp garam masala powder 
Few chopped coriander leaves
1/4Tsp turmeric {Optional}
1Tbs lemon juice
2Tbs oil
4Tbs water{Adjust as needed}
Salt as needed
Directions 
- Preheat oven @350 degrees & line up a cookie sheet with parchment paper.
- In a bowl add chickpea & rice flour. Next add in chili powder, garlic paste, garam masala powder, turmeric,oil salt & lemon juice. 
- Mix the ingredients & then add in cabbage. The mixture looks crumbly now.  Then add in little by little water to make a thick batter. Adjust salt if needed. 
- Now take a scoop of batter & lay it on the parchment sheet. Repeat the same with rest of the batter leaving space in between. brush with little oil.
- Bake them for 15 to 20mins @400 degrees. They will be crisp on top & soft inside. 
- Remove them from oven & serve with a chutney or ketchup. 
Note
- Water quantity might seem very little. But it is just sufficient to make a thick batter. If you feel it's need then add another 1tbs water & it is perfect. 
Follow me on "Facebook", "Google+", "Pinterest", "Instagram" for daily updates. Leave me a comment on any queries regarding this recipe & I will be able to answer it for you as soon as possible. 


Friday, April 3, 2015

Baked Sweet Potato Fries

Sweet Potato fries are one of my favorite small appetizers I love to munch on. They were on my to do list for a long time & the time has come for me to experiment a healthy version of these at home. I saw many recipes but one caught my eye with the crispy texture I'm looking for. Baked sweet potato fries are tend to get soft in texture. Then I came across a recipe suggested adding corn starch for a crispier texture. The end result was satisfying as they were crispier out side & softer inside. One thing I would love to change the next time I'm making this fries is cutting them a little thicker than I have done here. Other than that they were perfectly good to munch on without any guilt. 
Prep Time-10mins 
Cook Time -30mins 
Serves-2people
Ingredients
2Big sweet potatoes
1Tbs corn starch
1Garlic grated / 2Tsp garlic powder 
1Tsp cumin powder {Coarsely grind} 
1Tsp chili powder
2Tbs oil 
Salt 
Directions 
- Pre-heat oven @350 degrees. Layer a cookie sheet with foil & keep aside.
- Wash & peel sweet potatoes. Wipe them with a cloth before slicing them. Cut them in lengthwise as see above. 
- Take a zip lock bag & add in sliced sweet potatoes to it. 
- Add in corn starch & lock it. Now shake it to coat corn starch evenly to slices. 
- Next add in garlic, cumin powder, chili powder, oil & salt. Lock the bag & shake it well. Make sure all are coated very well.
- Now transfer them to baking sheet & layer them neatly, while leaving space in between. 
- Bake them @350 degrees for 15-20mins. Remove from oven reverse the fries. 
- Again bake them for 5-10mins & remove them from oven. 
- Cool them off a bit & serve with a ketchup or your choice of dip. 
Note
- You can use your choice of spice mix to flavor it up. 
- Baking time varies from oven to oven. So check in between to avoid burning them.
- Make sure you are cutting bigger pieces rather than thin slices.
Follow me on "Facebook", "Google+", "Pinterest", "Instagram" for daily updates. Leave me a comment on any queries regarding this recipe & I will be able to answer it for you as soon as possible.

Thursday, April 2, 2015

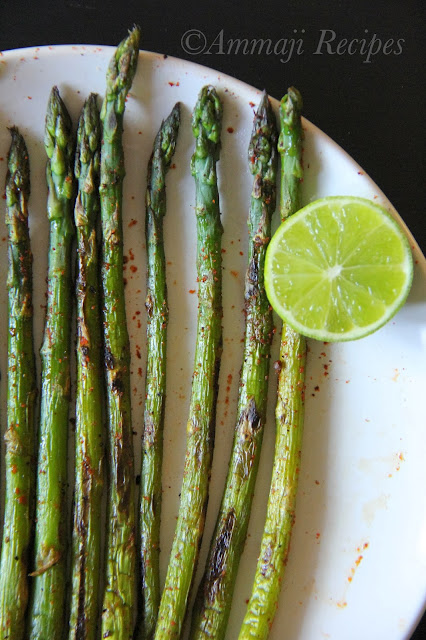
Baked Asparagus

Baked Asparagus is a simple yet healthy snack to enjoy. Asparagus is a good source of dietary fiber & lot of other nutrients which benefit your health. This veggie can be made a part of our daily healthy diets & enjoy the goodness of this veggie. I generally stir fry this veggie in a stove top method, but some time when the oven is heating up I love baking them too. 
Enjoy this healthy dish!!!
Prep Time-5mins 
Cook Time-15mins 
Serves-2people
Ingredients
20 or a small bunch of asparagus
A generous grind of black pepper powder / 1/4Tsp chili powder
2Tbs parmesan cheese
Pinch of salt
1Tbs oil
Lemon juice {Optional}
Directions
- Pre-heat oven @350 degrees.
- Wash & dry asparagus on a towel.
- Cut the tough ends of asparagus & take them in to a bowl.
- Add in pepper powder, cheese, salt & oil. Mix them thoroughly before laying on a baking sheet.
- Add them to baking sheet & bake them for 15mins or more.
- Remove them from oven & cool them before serving.
- Sprinkle little lemon juice & serve them.

For a stove top method stir fry follow the below recipe. It is easy as the baked version too.
Asparagus Fry

Follow me on "Facebook", "Google+", "Pinterest", "Instagram" for daily updates. Leave me a comment on any queries regarding this recipe & I will be able to answer it for you as soon as possible.

Wednesday, April 1, 2015

Sun-dried Tomato Pinwheels

Me and my blogger friends are starting on a month long journey with "Fire Up Your Oven All This April". Enjoy the delicious baked recipes I will be sharing here & do visit the other bloggers too for awesome recipes. Check out the Blogging Marathon page for the other Blogging Marathoners doing BM# 51.
Pinwheels have been on my to do list for a longtime. Snacks are made very occasionally at home & I got an opportunity of making this snack for world cup series. We totally enjoyed them with sun-dried tomato filling along with generous amount of cheese to make you tempt for more. The store bought pastry sheets with make the job much easier & the filling can be of your choice so be creative & greedy about the fillings. 
Prep Time-40mins {Thawing the pastry sheet + making pinwheels}
Cook Time-15to20mins
Serves- 18 to 20 pinwheels {Depends on the shape of puff pastry}
Ingredients
3Square shaped puff pastry sheets thawed
1Cup cheddar cheese
1/2Cup chopped sun dried tomatoes
1/4Cup chopped cilantro & spring onions
1Egg + 1Tbs water
1Tsp black pepper
1/4Tsp salt
1/4Cup all-purpose flour to roll
Directions
- Pre-heat oven @350 degrees.
- Break egg in to a bowl & mix it well with water. Keep aside.
- Dust the surface with little flour & roll the pastry sheet a little to flatten the layers.
- Brush the sheet with egg mixture.
- Sprinkle the cheese as needed. Then add in sun dried tomatoes, cilantro & spring onion.
- Roll the sheet & cut them in circles.
- Arrange them on a baking sheet leaving a little space in between.
- Bake for 15mins or more as needed till the outer layer turns to light brown in color.
- Remove from oven & allow them to cool on counter top.
- Serve with a ketchup or as they are.
Note
- Baking time varies from oven to oven. Do adjust accordingly.
Follow me on "Facebook", "Google+", "Pinterest", "Instagram" for daily updates. Leave me a comment on any queries regarding this recipe & I will be able to answer it for you as soon as possible.

Monday, February 23, 2015

Beetroot Yogurt Chutney

Curd Chutneys are simple & easy to make. They take very less time & you don't have to be a expert to make one. Beetroot Yogurt Chutney is one of my favorites & love making it very often. Probably it's the goodness of the beetroot that motivates me to make it more often. The recipe I shared is one way of making it. You can add in fried onions & can flavor it up with mustard, sesame or your choice of dressing too. I make eggplant chutney regularly, but it is very similar to this chutney what I'm sharing here. The other one is the tomato sesame chutney, which is flavored with sesame paste along with yogurt & it is simply superb. Give this chutneys a try & I'm sure you will simply love them. These chutneys can be paired with rice, roti & many other south indian tiffins. 
For this week theme on BM I'm presenting "Cooking for One". Enjoy the dishes & don't miss the update. Check out the Blogging Marathon page for the other Blogging Marathoners doing BM#49.
Prep Time-5mins 
Cook Time 10mins 
Serves-2People
Ingredients 
2Cups grated beetroot
1&1/2Cups thick yogurt/Curd
1Tbs lemon juice
Salt to taste 
Tempering 
1Tbs oil 
1Tsp chana dal 
2Tsp urad dal 
1Tsp mustard seeds 
1Tsp jeera
3Red chili's broken in to half 
2Green chili's chopped
1/2Tsp hing
Few curry leaves 
Directions 
- Heat pan with oil. To that add in chana dal, urad dal & fry them till they turn light brown in color. Next add in mustard, jeera, red chili's, green chili's & curry leaves. Fry them till mustard starts jumping & last add in hing. Switch off heat & transfer it to a plate. 
- To the same pan add in grated beetroot & sprinkle with little salt. Close pan with lid & cook for 5mins on low heat. Switch off heat & transfer to a bowl. 
- Once the beetroot is cold enough to handle add in curd & enough salt to it. Add in lemon juice & tempering to the curd. Mix them well. 
- Let it sit for sometime before you serve, so that the flavors will mingle perfectly.
Note 
- If needed cook beetroot for more than 5mins.  
- Lemon juice is optional. 
- If the curd is too thick add little water to get the perfect consistency.
Here are the other 2chutneys I was mentioning above which are very similar to the recipe I'm sharing here. 
Follow me on "Facebook", "Google+", "Pinterest", "Instagram" for daily updates. Leave me a comment on any queries regarding this recipe & I will be able to answer it for you as soon as possible.

Thursday, February 19, 2015

Egg Fry

Egg Fry is a easy side dish. This protein packed dish can be a served as appetizer, side dish & also as snack. Eggs are perfect for any kind of meal. On lazy days & when I have no company for lunch this fry is to my go as it is filling & tasty.
For this week theme on BM I'm presenting "Cooking for One". Enjoy the dishes & don't miss the update. Check out the Blogging Marathon page for the other Blogging Marathoners doing BM#49. 
Prep Time-5mins
Cook Time-10mins 
Serves-3people
Ingredients 
6Eggs boiled & peeled
1Small onion sliced 
2Tsp red chili powder {Adjust as needed} 
1Tsp turmeric powder
Salt to taste 
1Tbs oil
1Tbs lemon juice {Optional}
Few spring onions to sprinkle {Optional}
Directions 
- Slice eggs vertically as seen in picture & keep aside.
- Heat pan with oil. To that add in sliced onions & fry them translucent. 
- Next add in sliced eggs to pan. Arrange nicely without disturbing the yolks. 
- Sprinkle turmeric, chili powder & salt to pan. Fry them on each side. You should see little blisters on each side of eggs. 
- Switch off heat. Sprinkle lemon juice & spring onions to fried eggs. Mix them well. 
- Egg fry is ready to serve. 
Note
- Onions, lemon juice can be excluded from the dish.
Follow me on "Facebook", "Google+", "Pinterest", "Instagram" for daily updates. Leave me a comment on any queries regarding this recipe & I will be able to answer it for you as soon as possible.

Wednesday, February 18, 2015

Tomato Rice

Tomato Rice is a simple yet flavorful dish. It's easy to make & requires less ingredients & time. If you are making with a fresh cooked rice it might take a little more time, but for a left over rice it is a super fast dish. On those lazy days when I have to cook just for myself I prefer one pot meals rather for an elaborated lunch. This is one of many versions to make this rice, but I prefer this version because of it's simplicity.
Enjoy this dish!!!
For this week theme on BM I'm presenting "Cooking for One". Enjoy the dishes & don't miss the update. Check out the Blogging Marathon page for the other Blogging Marathoners doing BM#49.
Prep Time-5mins
Cook Time-30mins
Serves-1person
Ingredients
2Cups cooked rice / Basmati rice
1Small onion sliced
2Big tomatoes chopped
1/2Cup cauliflower florets
1Tbs oil
2Bay leaves
1Tbs ginger garlic paste
1Tsp garam masala powder
1Tsp red chili powder
Salt to taste
1/2Cup chopped mint & coriander leaves
Directions
- Heat pan with oil. To that add bay leaves  & ginger garlic paste. Stir them for few seconds.
- Next add in onions & cook them for 2mins while sautéing in between till they are soft.
- Add in tomatoes & cauliflower florets to pan & cook them for 5mins to 10mins on low heat with a closed lid.
- Once tomatoes are soft & cooked perfectly sprinkle with garam masala, chili & salt. Mix them well & allow them the curry to come together.
- Sprinkle in mint & coriander leaves. Next add in rice & mix them well. Adjust salt & chili powder if needed.
- Cook on low heat for 5mins & Stir in between to avoid sticking rice to bottom of the pan. Switch off heat & close pan with a lid. This makes the rice more flavorful & tastier.
Note
- Though I limited to cauliflower, you can add in more veggies like carrots, beans, green peas, capsicum to this dish.
- You can use leftover rice or freshly cooked rice in making this dish.
Follow me on "Facebook", "Google+", "Pinterest", "Instagram" for daily updates. Leave me a comment on any queries regarding this recipe & I will be able to answer it for you as soon as possible.